How to Repair Driveway Cracks
The cracks in your driveway are commonly caused by aging, shifting subbase, or freezing and thawing. Leaving them untreated can lead to a more serious problem - moisture can enter the gaps and eventually result in erosion. While some opt for replacing the entire area as their solution, taking action before the issue worsens may be a better answer. Here are some simple steps you can take for an easy driveway crack repair.
Clean the Area
This home project starts with cleaning the surface of the entryway. You can use a broom or a leaf blower to clear out the dust, leaves, and other debris. You'll also need to pluck weeds in between the cracks.
If the area is prone to moss growth, a pressure washer can be used to remove it. Pour some bleach in a spray bottle and target the affected spots. Afterward, use a scraper for scratching it off the asphalt; then, rinse the pavement with a garden hose. Note that you have to let it dry before proceeding to the next step.
Patch Holes and Gaps
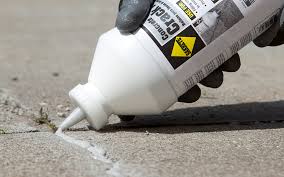
The key in this task is to patch the gaps and holes before applying layers of the driveway crack sealer. For rifts less than half an inch, you can use a bottle of filler. This product is very fluid and has self-leveling characteristics. Remember not to overfill the crevices so they won't be visible once the sealant has dried. If you accidentally did, you can use a scraper to level and spread it out; then, let it settle for about 4 to 8 hours.
Pour the Sealant
Applying the sealer can be messy, so you have to protect nearby doors or other surfaces with a drop cloth. Once that's done, start sealing the edges. Do this using an old paintbrush, particularly if your driveway meets a structure, like a sidewalk or your garage.
Once you're finished with the edges, you can proceed with the rest of the surface, crosswise. Pour the product along the width of the entryway; then, spread it evenly with a squeegee. Note that you have to put just the right pressure on it. If you push too hard, some of the product might squeeze over the top of the tool. If you do it too loosely, the coverage will be too thick.
Allow it to cure for 24 hours; then, apply another coat. The second layer will create a stronger lock for the patches you made.
Doing a drivewaycrack repair is an easy project; when done right, it can help your entryway last longer. Remember to check the weather forecast before starting. If you'll have clear skies for the next 48 hours, that's a go signal. But, if rain is expected, you'll need to wait. You just need the gear to get started. The necessary tools and items are available at local hardware stores, and if you’d prefer professional help, you can always enlist the services of a trusted contractor.


Comments
Post a Comment